Simple Ray Tracing in Rust 5: Shading & An Astronomy Lesson
If you’ve followed the posts sequentially, you might notice
that our ray tracer is a little… bland. It effectively
distinguishes between only two features: object and no
object. It’s like a glorified hitscan algorithm, telling
you exactly where a given Scene gets in the way
of our triangles, and its output is a boring two-tone
canvas. We can do better.
Lambertian Shading
Remember back in part 1 of this series, where we mentioned Lambertian reflection? This model assumes that there are only two factors that affect brightness of a surface:
- The apparent brightness of the original light source
- The angle between the light source and the surface
- A surface perpendicular to the light will be maximally bright
- A surface parallel to the light will be completely dark
It’s a delightfully simple model, but will add an amazing amount of depth to the images that we can render.
For simplicity’s sake, we shall treat incoming light from our light source as parallel. This is roughly what happens with sunlight in real life.
 |
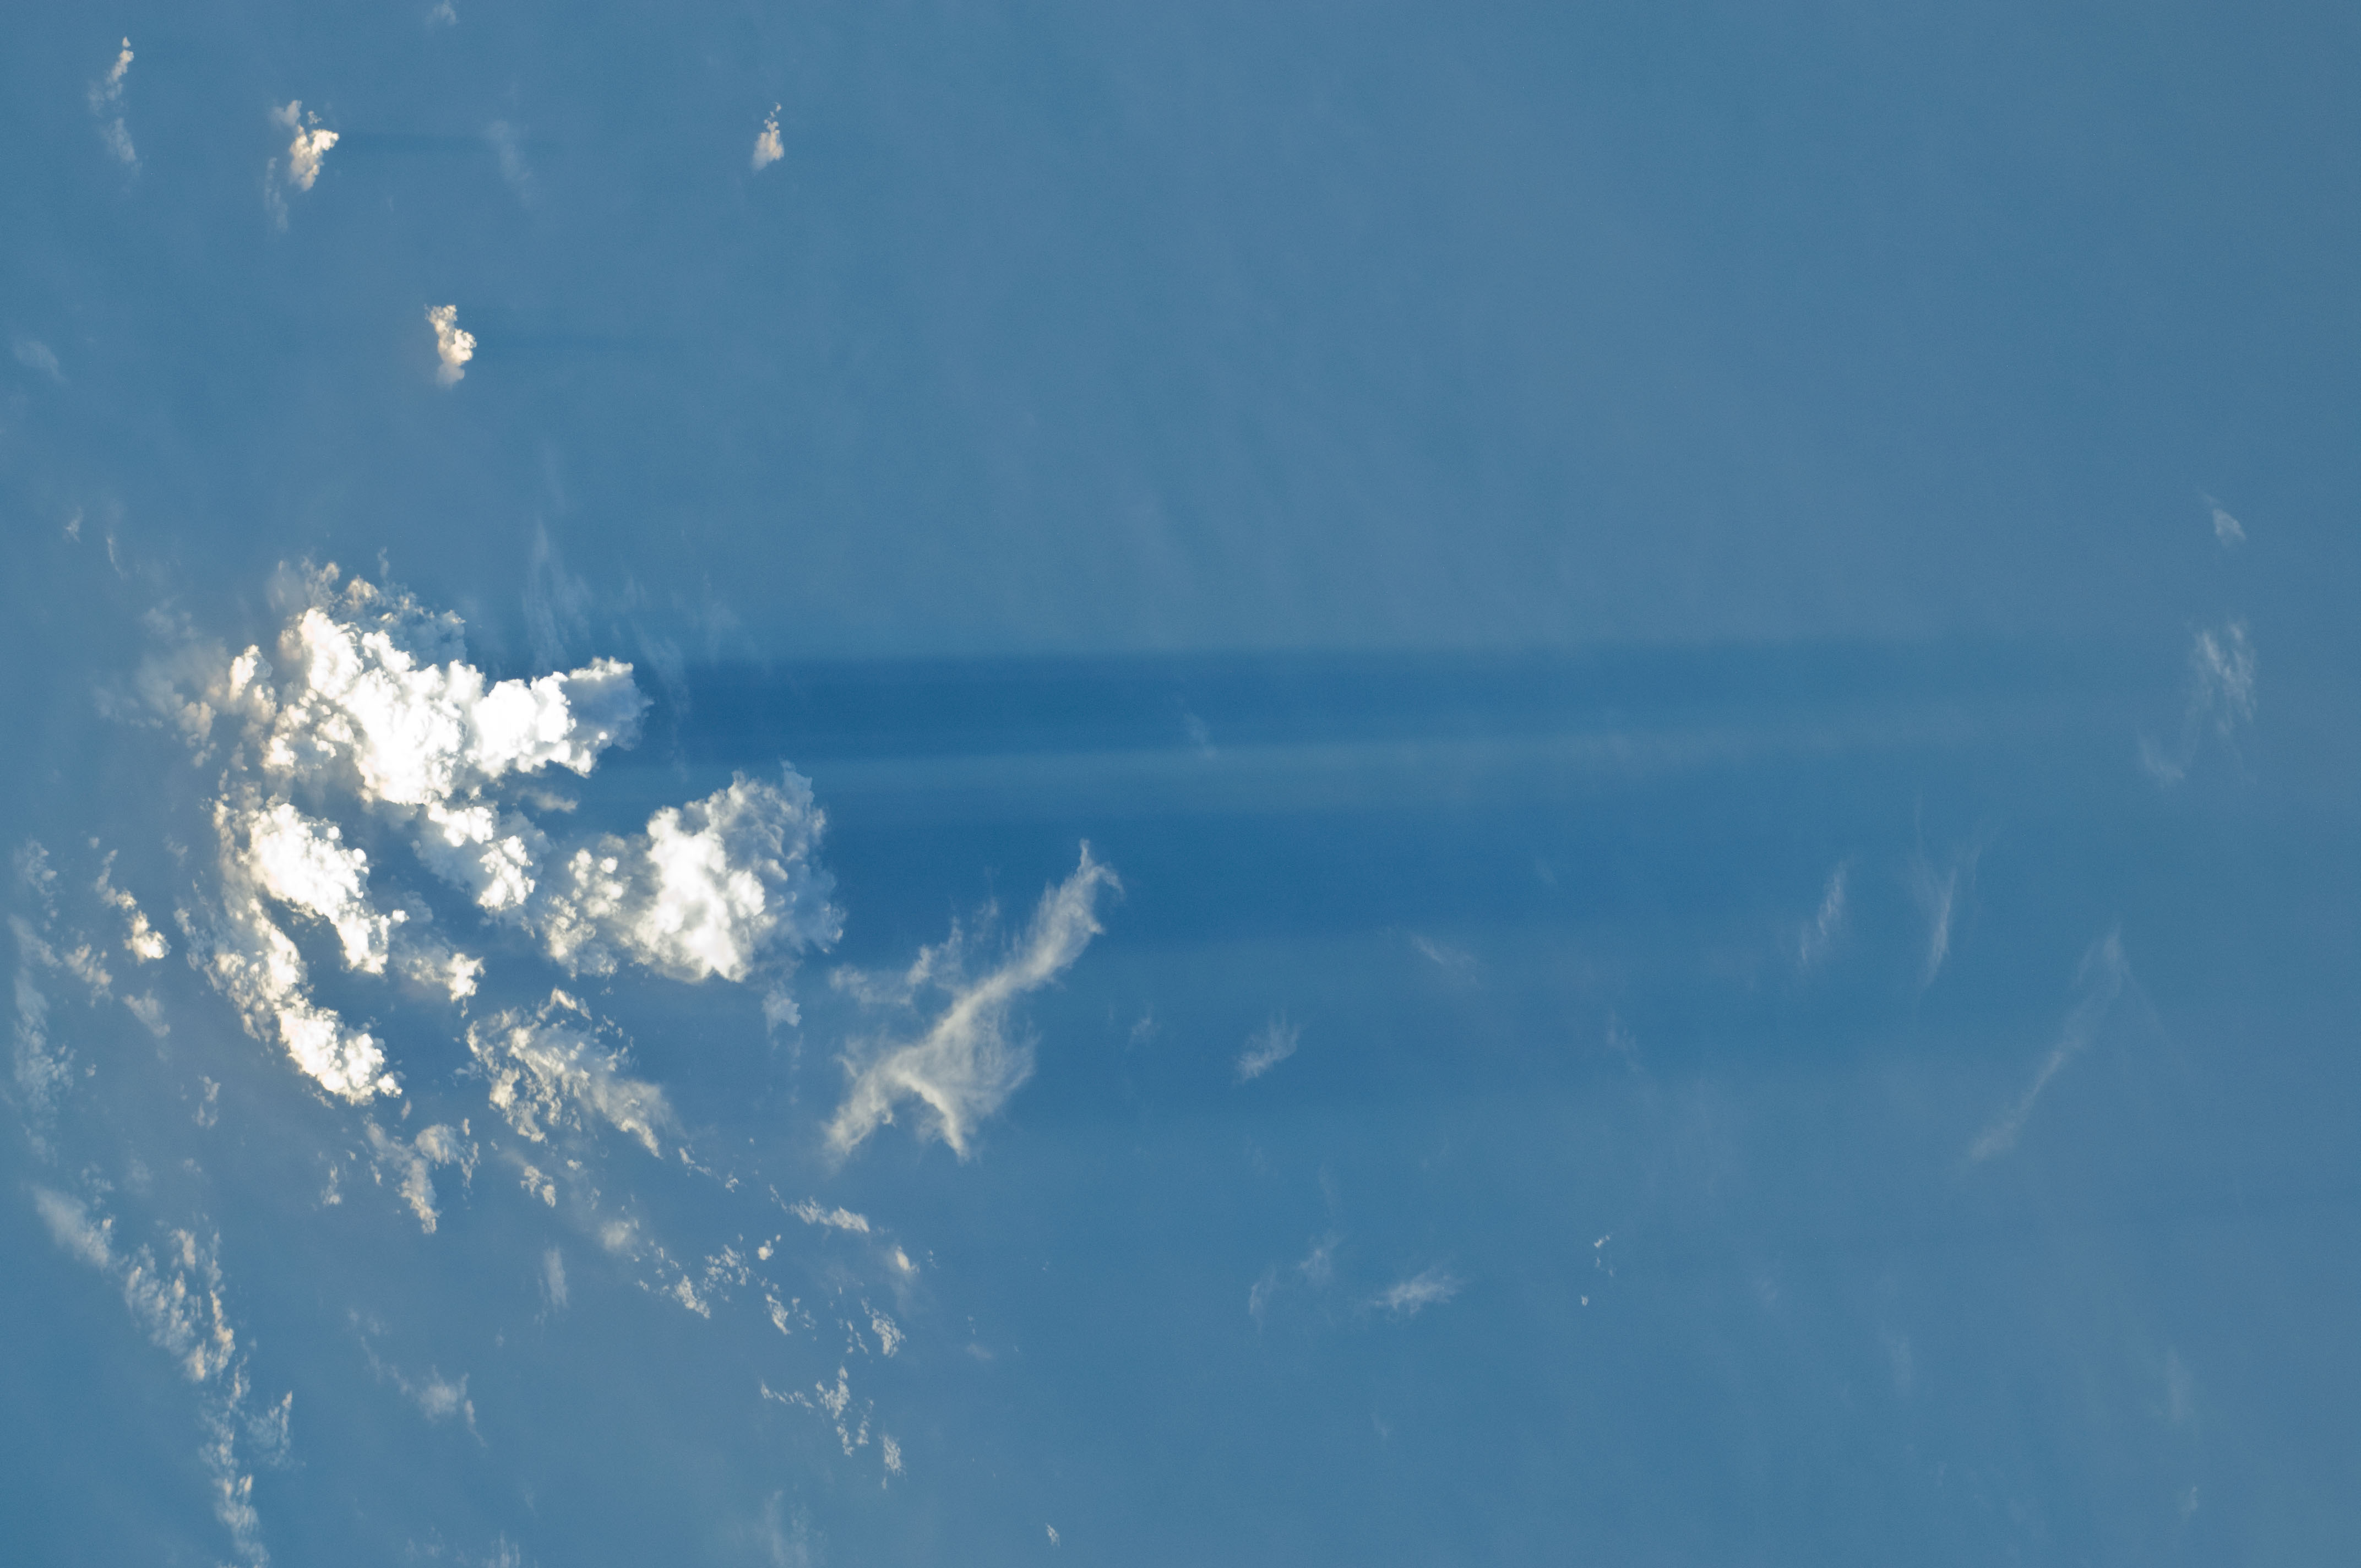
| Clouds cast shadows on the ocean, illustrating the parallel nature of sunlight. Source. |
This spectacular image, courtesy of NASA astronauts aboard the ISS, shows us the strange nature of sunlight. Normally, we would expect rays of light to diverge from their source; if you turn on a lamp in your room, the shadows it casts will all point in different directions. With sunlight, this is apparently not the case.
To be precise, sunlight still diverges, but the sun is so far away from Earth that nearby rays of sunlight appear to be almost perfectly parallel.
Let’s see what happens when we add a virtual source of sunlight to our codebase!
Translating To Code
First, we need a new struct to represent our light. It has two necessary parameters:
- The incoming angle of light
- The brightness/color of light
Notice that we don’t actually need to specify the light source’s coordinates. Instead, we abstract our sunlight as being produced infinitely far away; everywhere in our scene, it’s all coming from over the horizon in a uniform direction.
struct Sunlight {
    angle: Vector,
    color: Color,
}

impl Sunlight {
    fn new(angle: Vector, color: Color) -> Sunlight {
        Sunlight {
            angle: angle.normalized(),
            color,
        }
    }
}
Cool, that was easy enough. Now we need to update
Scene in order to reflect (no pun intended)
our changes:
struct Scene {
    camera: Camera,
    triangles: Vec<Triangle>,
    triangle_planes: Vec<Plane>,

    // new
    sunlight: Sunlight,
}

impl Scene {
    fn new(triangles: Vec<Triangle>) -> Scene {
        // other initializations

        let sunlight = Sunlight::new(
            DEFAULT_LIGHTING_ANGLE, DEFAULT_LIGHT_COLOR);

        Scene {
            camera: Camera::new(),
            triangles,
            triangle_planes,
            sunlight,
        }
    }
}
Now for our shading code. Remember the core loop of our ray tracing function?
for i in 0..res_width {
    for j in 0..res_height {
        let m = Vector {
            dx: vp.pixel_size * ((i - i_center) as f64),
            dy: vp.pixel_size * ((j - j_center) as f64),
            dz: 1.0,
        }.yaw(cam.yaw).pitch(cam.pitch);

        let get_intersection = |p: &Plane| p.intersection(cam.pos, m);

        let index_option = self.closest_triangle_index(&get_intersection);

        let color = match index_option {
            // expand for shadow calculations
            Some(_) => DEFAULT_LIGHT_COLOR,
            None => DEFAULT_BACKGROUND_COLOR,
        };

        pixel_colors.push(color);
    }
}
We need to expand what happens when we determine
there’s been an intersection between
our ray of light and a triangle. Recall
that index_option is a Result which
potentially unwraps into a (usize, Vector)
tuple. This signifies the index of the
first intersected triangle, and the
exact coordinate of the intersection point.
 |
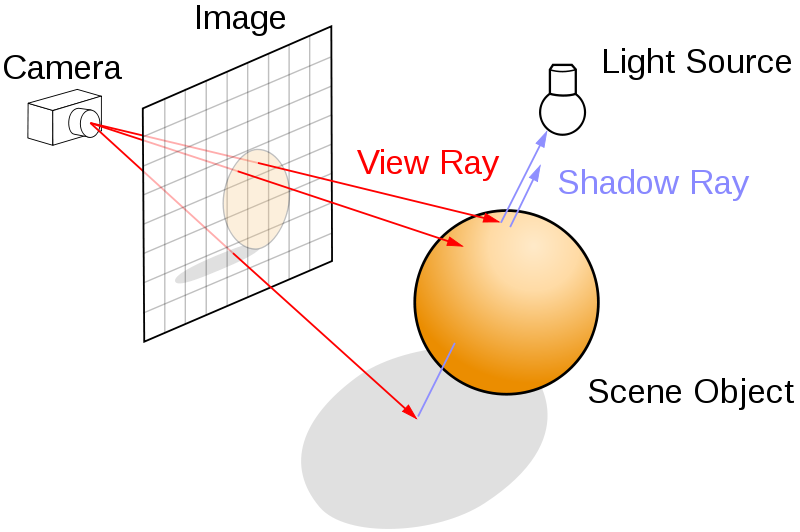
| Rays projected out from a camera onto a view plane. Source. |
From here, we have to project another ray, this time in the direction of the sun. If this “shadow ray” intersects another triangle, we will mark the corresponding pixel as being in shadow, since sunlight is blocked. If no triangles are encountered, we know that the triangle is being hit with sunlight and calculate the brightness of its Lambertian reflection.
First, we implement a new method on Scene.
It is similar to the closest_triangle_index
helper that we made in part 3, but instead
of returning a triangle index and an intersection
point, it returns a boolean depending on whether
or not it hits a triangle anywhere. Since
it short-circuits, it’s somewhat more optimized
for this task.
impl Scene {
    /// Return true if a ray defined in an intersection detection closure
    /// collides with a triangle.
    /// Excludes one triangle.
    #[inline]
    fn intersects_triangle(
        &self,
        get_intersection: &dyn Fn(&Plane) -> (Vector, bool),
        to_exclude: usize
        ) -> bool {

        let intersect_map = |(index, plane)| -> Option<(usize, Vector)> {
            let (intersect, is_ahead) = get_intersection(plane);
            if is_ahead {
                Some((index, intersect))
            } else {
                None
            }
        };

        let intersects_t = |(index, intersect): (usize, Vector)| {
            let t = &self.triangles[index];
            intersect.slow_intersect_check(t)
        };

        self.triangle_planes.iter().enumerate()
            .map(intersect_map)
            .filter_map(|x|x)
            .any(intersects_t)
    }
}
Now we add this boolean check in our color match statement, and implement Lambertian shading.
Using the dot product between a triangle’s normal angle and the sunlight, we can determine how far head-on the triangle face is to the sunlight, and thus determine how bright it should appear.
// in `iterate_over_rays`
let color = match index_option {
    Some((i, intersect)) => {
        let get_intersection = |p: &Plane| {
            p.intersection(intersect, self.sunlight.angle)
        };

        if self.intersects_triangle(&get_intersection, i) {
            DEFAULT_SHADOW_COLOR
        } else {
            let plane: &Plane = &self.triangle_planes[i];
            let normal_vector = plane.normal();
            let brightness = normal_vector.dot_product(self.sunlight.angle);
            self.sunlight.color.scale(brightness)
        }
    },
    None => DEFAULT_BACKGROUND_COLOR,
};
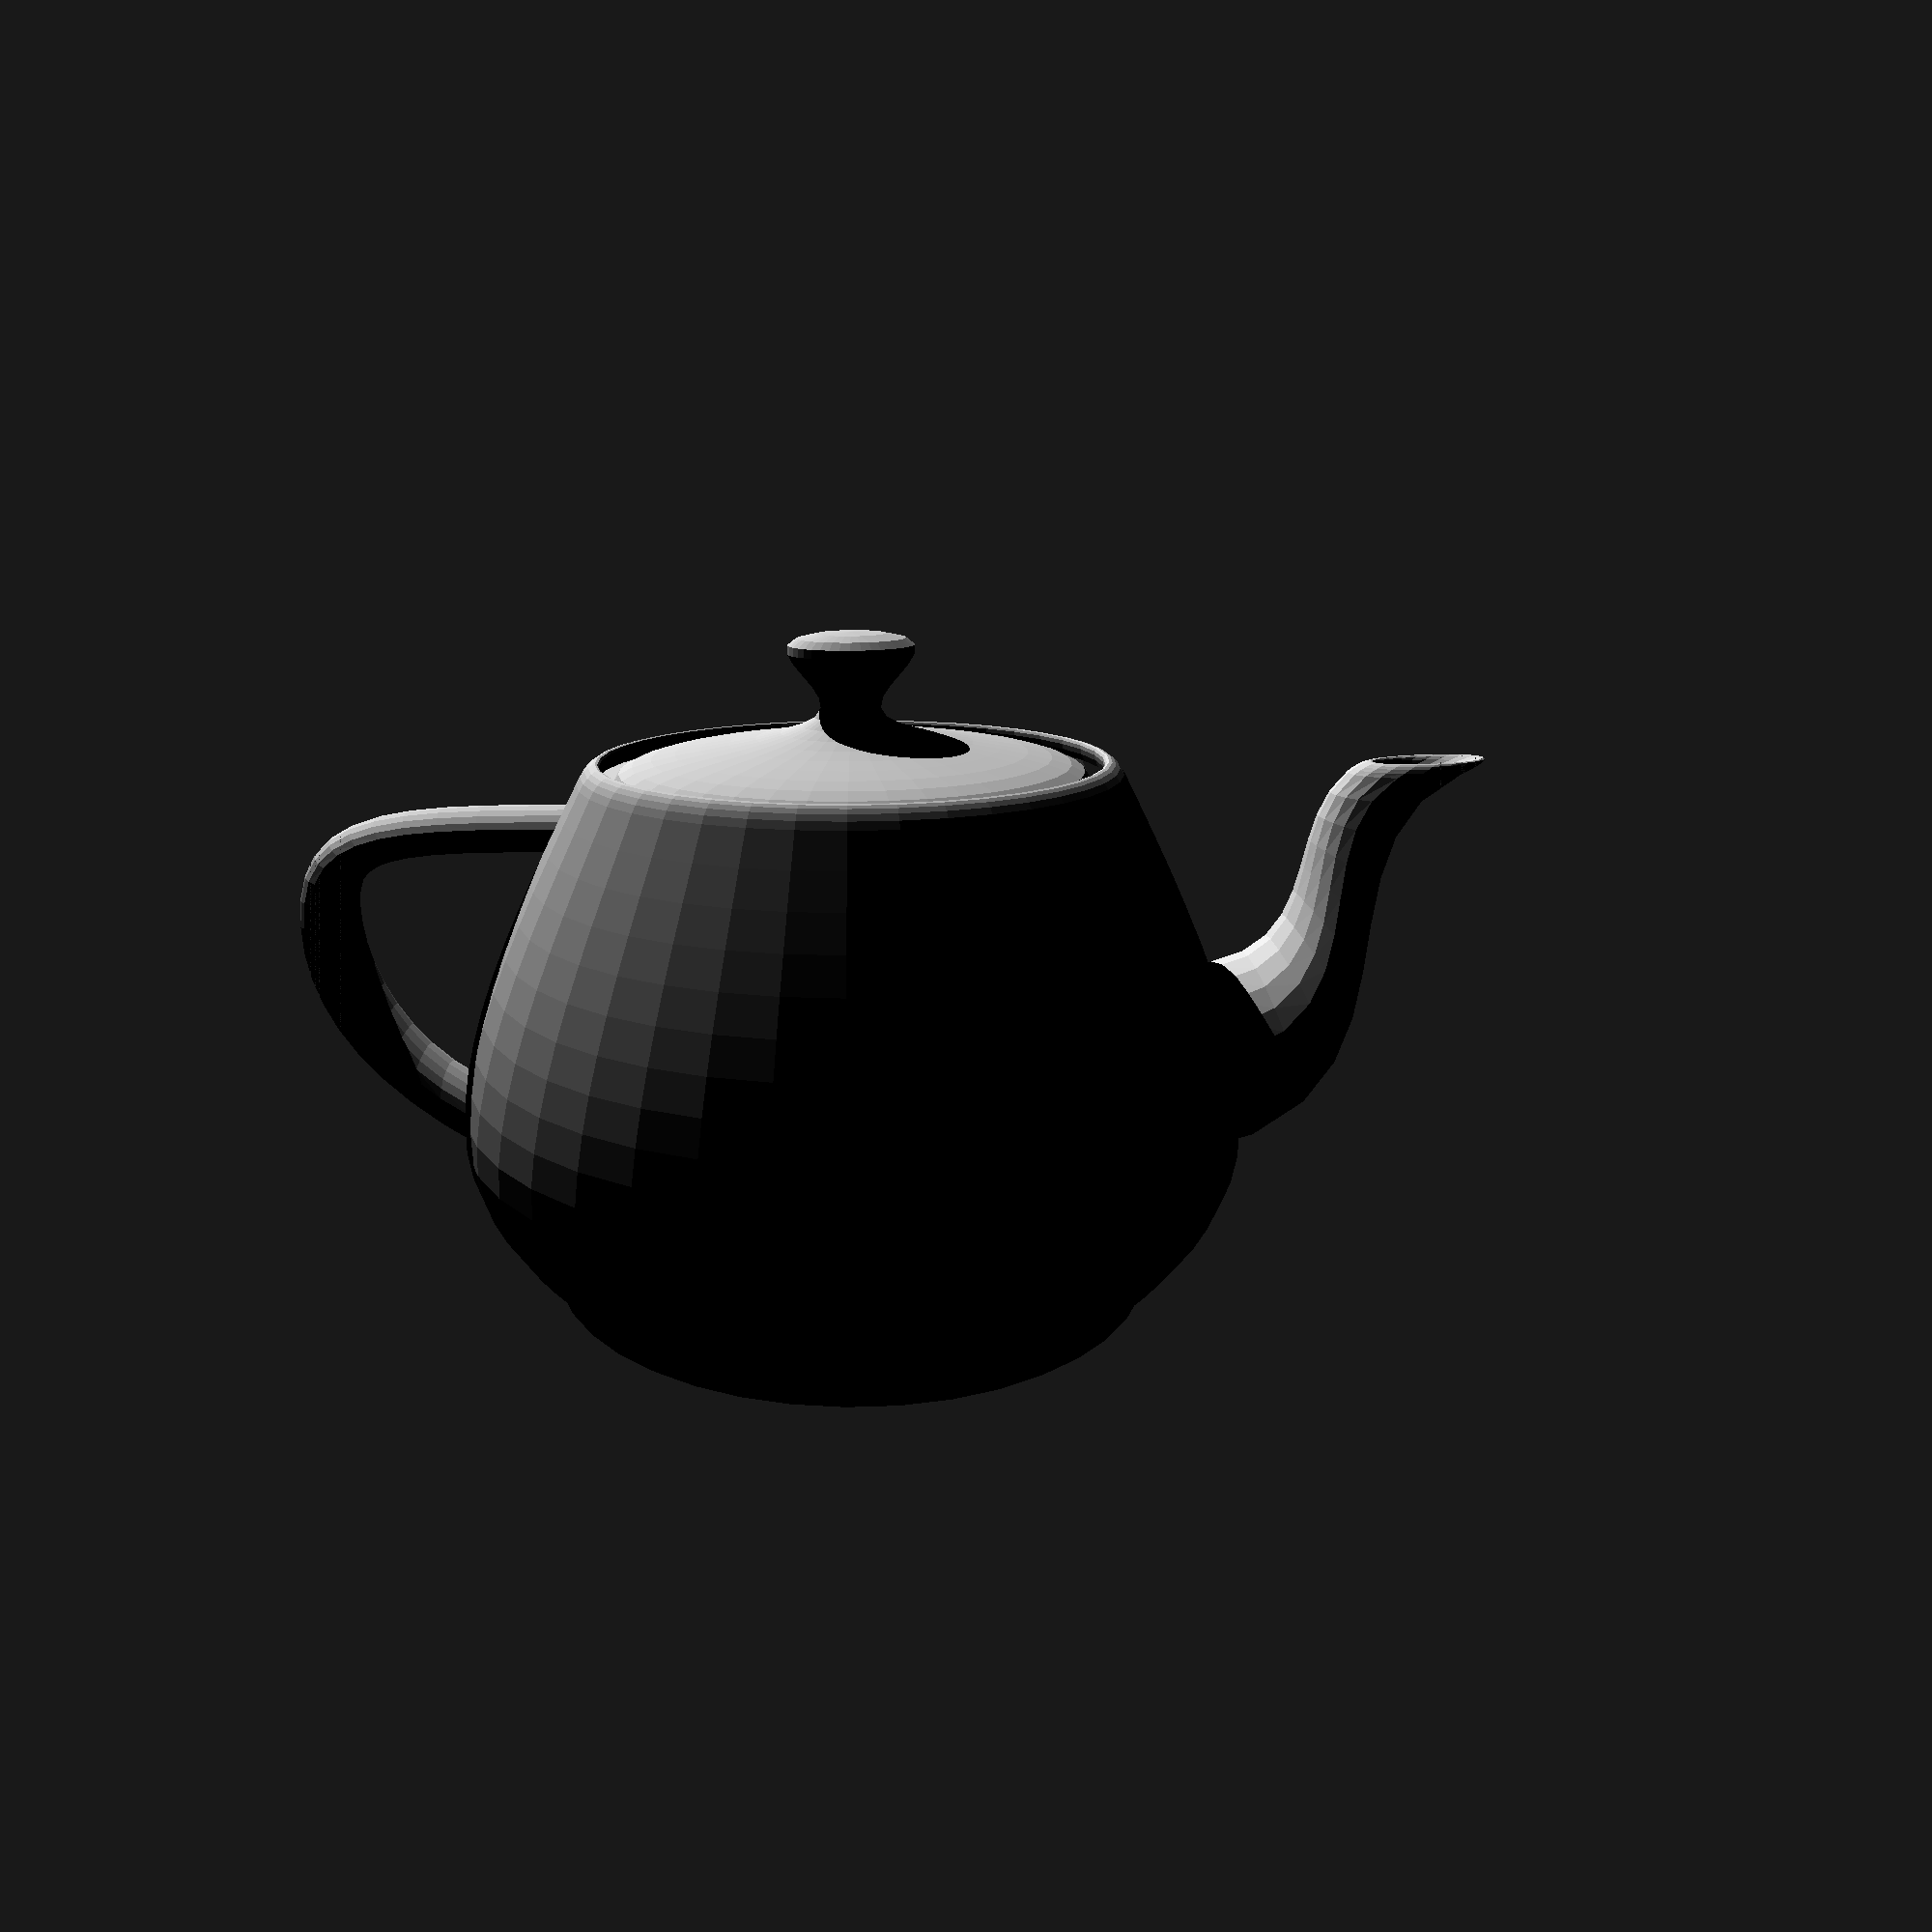
The result is really quite extraordinary. I mean, look at what it can do with our little teapot:
 |
| We made a teapot! |
Conclusion
Now that we have actual shadows going on with our teapot, I daresay we’ve managed to unboring our pictures up! However, unless you have a seriously overclocked, single-threaded beast of a machine, you’ll also notice that the program runs horrifically slow. Stay tuned for the next parts, where we’ll speed this sun of a raygun up with some clever optimizations, before finally making it parallel.